KW
Casting the Prosthetics
On this page I have included the research that I conducted before chosing the material that I will cast the prosthetic peices out of and similarly the way in which I will cast the prosthetics. I have looked at the two techniques, Injection filling and hand filling, also the different materials, from silicone to cold foam and foam latex. I have discussed the pros and cons of each material. After this there is photographic evidence of the casting process that I used for the prosthetic pieces.


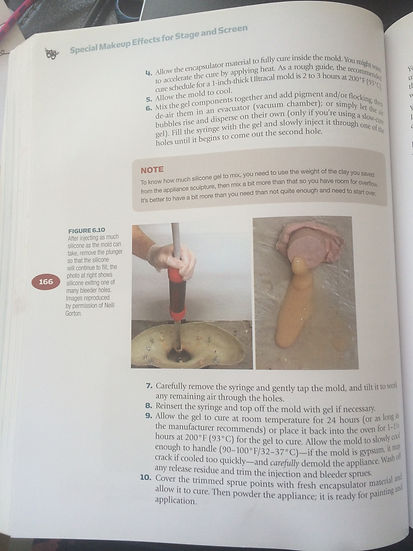
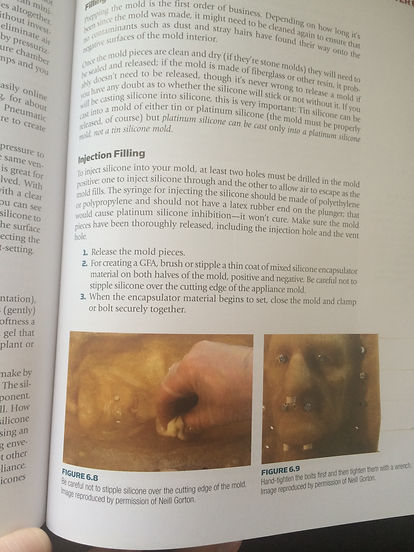
Debreceni.T. (2008) pg165-167
I have conducted this research into the methodologies for filling moulds in order that I achieve the most successful pieces from the prosthetics. I have looked into injection filling and hand filling as these two are the most prevelant techniques. The Special Makeup Effects book has a lot of information concerning the techniques to do these techniques. The injection method seems as though it would be the most successful, as the moulds are already bolted together and just need tightening, however it leaves a hole where the syringe is inserted into the mould. This means that the piece may have a blemish, however this can be patched up to create a neat finish. These pages have information concerning the silicone casting of a piece. I had completed a relatively simple cast for the last project using the injection method. I have learnt from this project that it is a good idea to use car body filler to cement a pipe in the injection hole this way the pipe fits perfectly into the fibreglass and will not come out when trying to cast the piece. Using a large injection tube to fill the mould is the best approach as you will not need to refill the tubes and potentially allow into the mould.
Bleeder holes are a component that I am relatively new to this project, they are small holes drilled into the core of the mould that allow silicone out of the hole when it has filled to the point of placement. Bleeder holes should be placed in areas where there may be a tendancy for air to get trapped. It will allow you to see how far the mould has filled when the silicone started to pour out, at this point one should fill the hol with a small piece of clay.
 Drill BitThis drill bit was used to create the large hole in the fibreglass core. It has large serrated points around the rim. There is a connecting bit that fits into the drill head, with the drill bit attached to that. This then rotates very quickly in the drill cutting a perfect hole the size of the drill bit. |  Drilblling the Injection HoleThis hole is the result of the drill bit in the first photograph. It is the perfect size for the tubing that I bought for the injection hole. I made sure that it fit snugly into the hole so that it was not too loose causing issues when trying to cast the pieces. I smoothed off the inside with a small bit of sandpaper, however not too much as I did not want to expand the hole too far that it meant the pipe did not fit. |  Attaching the Injection TubeIn order to get the injection tube to perfectly fit the core the angle that I required meant cutting a hole in the jaw area to allow the pipe to stand straight. The angle that I required to ensure that the pipe hole did not line up it the seam of the two parts of the mould meant that this hole was necessary. |
|---|---|---|
 Attaching the Injection TubeHere I cut the pipe at an angle so that it laid perfectly flat against the fibreglass. To do this I cut the pipe with a vibrosaw (vibrating blade). Once inserted I made sure that it came out the jaw hole perfectly. |  Injection Tube Inserted into CowlHere I completed a test to make sure that the pipe lined up with the hole in the jaw. Once I had found it to fit well I found once I had attached the syringe it did not quite fit, therefore I needed to cut a bit more of the fibreglass core off which can be seen in this photograph. |  Attaching the Injection TubeHere you can see the car body filler that I have used to attach the pipe to the fibreglass core. I made sure to fill all of the surrounding area around the end of the pipe. Once I had filled the outer edge I sanded the body filler to a smooth the surface to ensure that the ridges did not affect the casting of the prosthetic appliances. |
 Attaching the Injection TubeThis photograph shows the inside of the fibreglass core with the pipe attached from the outside. I then used car body filler to set the pipe on the inside as well as the outside. Here you can see the car body filler around the base of the pipe. |  Casting the CowlWhen I was casting the cowl piece I required the help from two others, to ensure that the whole process went smoothly. I rested the mould upside down to ensure the silicone filled upwards. The two helpers then filled the bleeder holes that I had created on the inside of the core to let me know when the silicone had filled up the entire mould. The bleeder holes were placed in step so I could see how the mould filled. The bleeders were placed near the edge of the piece to ensure a full mould. |  Final Cowl MouldThis is a photograph of the mould after inserting the silicone. A small amount of silicone escaped from the edge of the mould at the bottom. I left the syringe in the mould in order to stop any air being drawn into the mould. On this first run there was not enough silicone as there is a clear level where it cut off implying that I needed more silicone. |
 Injection Filling the MouldCasting the face piece involved using an injection tube to fill the mould. I used two syringes to fill the mould which is around 200ml. Here I have laid out all the materials that I will need for the process, including mould wax, pigment, flocking, silicone and the tools to carry this out. |  Injection Filling the MouldHere I have left the syringe in the fibreglass mould to prevent the air from re-entering the mould. I have bolted the mould with multiple screws which ensures an even pressure all around the mould to create very thin edges to the piece. It is also possible to see where the bleeder hole have been filled with the clay to prevent too much material being wasted. |
 Silicone CastingThis is a photograph of the silicone appliance that I ran in the face mould. Unfortunately the cap plastic encapsulation layer de-laminated from the silicone. Overall the face worked perfectly apart from the area around the nose and the right brow. |  Silicone CastingAlthough this piece did not work perfectly I was able to note that I could create very fine edges with the mould, which would work really well for the application. I felt that the intrinsic colouring also worked well as it was the desired shade that I was aiming for, I mixed a little black flocking in order to break up the colour a little creating a successful more realistic colour for the piece. |  Gelatin CastingTo begin the process of casting I ran the piece in gelatin as this would give me a good idea of how much silicone I would need for the casting process. The piece came out really well, the edges were very thin and the piece came out really well. This meant that when I were to create the silicone I knew that the edges would be very thin for a smooth application. |
|---|---|---|
 Silicone CastingI ran the silicone using Pro Gel 00. I had never used this material before and I did not know that it was pre-deadened at the time therefore I added 25% deadner to the mixture making it extremely soft and pliable. This turned out to not be a big issue, however it could have potentially been bad. |  Silicone CastingAlthough the silicone did not fill the flashing of the face piece it filled all of the mould itself. and the edges were extremely thin. I was very happy with the result of the edges on this piece as they would be easy to blend. |  Silicone CastingThis photograph shows just how thin the edge were, not even filling the mouth area with the silicone and the eye keys were almost completely dettached. This was perfect for applying the makeup. This was the final piece that I used for the application for the filming and the assessment day. |
 Vacuum Form MachieneThis is the manual vacuum form machine that will allow the user to melt the plastic to the desired amount and then create the vacuum which will make the result desired. I initially tried using this machine for the vacuum form, however the vacuum wasn't powerful enough to make a successful version of the face. |  Fibreglass Face in Vacuum FormI was trying to create a vacuum formed version of the face onto which I could lay the finished prosthetic pieces once complete. This was a very helpful product to create as it meant that I could protect the prosthetics from being damaged. My issue was the undercut in the fibreglass which caused the plastic to pop when the vacuum was too large therefore I had to cut it off at an appropriate time. |  Digital Vacuum Form MachieneThis is the digital vacuum form machine that will automatically heat the plastic and begin the vacuum when desired. The vacuum form machine will create suction around the item being moulded creating a slightly larger version of the item being moulded. |
|---|
As a small part of the project I wanted to create a vacuum form versino of the face and the head to rest my prosthetic pieces onto after creating them. However I found that the head cast was too large for both machines therefore it was not possible to create a head replica. This is explored further in the section where I created the cap for the horn to be attached. I was able to create a vacum form version of the face, however due to the undercuts in the fibreglass it meant the plastic waspulled too tightly in some attempts at using the machine.
Here are some photographs from casting the face piece in gelatin and silicone. I first ran the piece in gelatin to remove any dirt and to see what quantity of silicone I would need for the casting. I then ran the face piece using super baldiez cap plastic as an encapsulator which worked very well except for the cap plastic coming off the nose area on the piece. I then tried numerous times to run the cap plastic in the mould, however it was notpeeling away nicely with the silicone after running the pieces. I therefore decided to run the piece in pure silicone without cap plastic and apply this to the face. This is the final facial appliance that I used for the application for summative and filming.
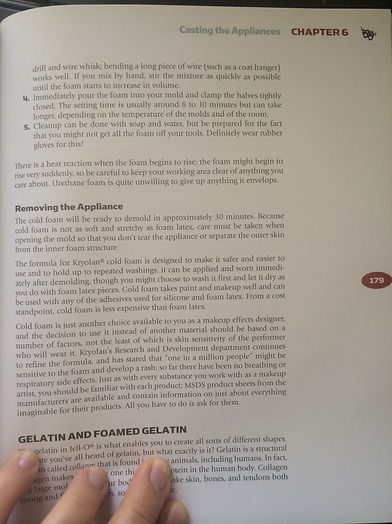
I wanted to research into alternative materials to use for the casting of the appliance, howeer as we have no access to a foam latex oven I was unable to use this as a material for casting the appliance. I then began to research into other potential routes, one that I came across was cold foam. I called PS Composites to ask if they had opinions on the material and I was told under no circumstances to use it on the skin. However this segment that I ound in Todd Debrecini's book notes that it is a potential product. According to Special Makeup Effects the material is essentially the same as foam latex except that it does not require an oven to bake. After the phone call to PS Composites I am wary of using it, however I would like to get a second opinion from a professional in order to fully understands its limitations and possibilities. As I felt that it would be very difficult to use a product with two minds about its uses I felt it safer to use silicone. Similarly there was not enough time or budget to experiment with the material before assessment that would allow me to create two sculpts and moulds if it were to fail.
Debreceni.T. (2008) pg176-179
This is a very helpful book, the details of the enitre process and helpful hints and tips are given to the reader to ensure that the results will be a sucessful as possible considering the reaser follows the book.