
KW
Moulds
As I was creating a full head prosthetic it was important that I get the moulds correct in order that the pieces I ran came out perfectly and there were no blemishes the would ruin the piece. Im creating all of my moulds out of fibreglass as these are the most substantial moulds and will work the best with a fibreglass core. I have created relatively simple fibreglass moulds before including a brow piece and two part horn mould, however a full face was realatively new to me and therefore required a lot of direction and attention in terms of what needed to be done in order to finish on time.


 Cowl MouldFor the cowl piece it required that I make a two piece fibreglass mould that fit together perfectly to create a very small seam. As my sculpt had no features which dictated the direction that I mould the two halves I decided to create a central line running front to back as this would split the two halves into equal parts. To create this mould it was necessary to build a wall of wet clay. I found creating the wall I made a few blemishes in the sculpt which needed rectifying yet it went smoothly. |  Cowl MouldThis is a close up of my wet clay mould. I was very happy with how neatly the result turned out. I spent my time ensuring that I could get as smooth a finish as possible on my piece. I found it difficult at first to build up the clay as it kept falling off due to gravity, however I worked out a way to bulk up the back side to help it stand up straight. As I was using wet clay it was very malleable and worked very well. |  Cowl MouldI created small pieces to work as keys which I attached to the wall this when the two halves are placed together they will slot perfectly back into place. I also made indents as an extra precaution. Wayne showed me a quick method using a 10p coin twisting it around creating neat equally sized holes in the clay. |
|---|---|---|
 Cowl MouldOverall I was extremely happy with the result of this wall, as I had never created such a piece before I felt it had a great structure and neatness that would translate onto the fibreglass mould ensuring that the casint process runs smoothly. |  Cowl MouldHere I have applied the gel coat to the sculpt. I spoke to Pete about moulding my piece and he suggested using mac wax and applying a light layer of talcum powder to the piece to ensure that I did not miss any areas with the gel coat and the whole sculpt was covered. He also said that this would prevent other particles sticking to the sculpt making the sculpt as neat as possible. |  Cowl MouldHere I have applied a layer of small framgents of fibreglass to pick up the groves of the sculpt. My gel coat had set before I began applying fibreglass which meant that I had to use resin to stick it to the mould, however this should not be an issue in the final mould. After this initial layer I began with veil to pick up the small shapes and then layered on the thicker fibreglass to create a strong structure. |
 Second Half Cowl MouldIn this photographs I have taken the wet clay off the first half of the sculpt in order to fibreglass the other half to fit perfectly into the first. It took quite a while to clean off the clay to leave a perfectly smooth result. Once I had done this I patched up the sculpt and applied release over the fibreglass to ensure the two halves do not fuse together. |  Second Half Cowl MouldI applied a first layer of gel coat to the sculpt to pick up all of the detail in the mould. I also applied lay up resin mixed with talcum powder (mud coat) to fill in the undercuts and indents in the sculpt. I left this is the sun in order to set quicker as there was time constraints in the workshop on the day of moulding. |  Second Half Cowl MouldThis photograph shows the gel coat and mud layer once set, I quickly applied a first layer of fibreglass to the mould so that I could come back to the workshop after the time in which we were not allowed to work. This meant that I could continue applying fibreglass after without issues. However I was quite rushed which meant there were a few air bubbles in the mould which needed patching with gel coat. |
 Photo of me Working on the MouldAt this point I had finished applying the gel coat to the mould, I was just checking that I had completely covered all areas, including any areas of small details. |  Second Half Cowl MouldThis is the final fibreglass mould finished with a layer of veil in order to create a smooth surface on the outer edge of the mould. I was quite pleased with the result of this mould for the first large two part mould that I had created. |  Face MouldI have applied a gel coat and mud layer to the sculpt to ensure that there are no undercuts in the sculpt. I left this is the sun to set quickly for the time constraints. |
 Face MouldThis is the sculpt with the first layer of fibreglass applied, this was done so that I could continue the fibreglassing process after the break from the workshop. I was not particularly happy with the result of this mould as there were air bubbles caught in the fibreglass which could affect the result of the pieces that are run in the mould. |  Face MouldIn this photograph one can see some of the air bubbles caught in the mould. There were some issues with getting the fibreglass to be air tight around the keys. However I tried my hardest to ensure that they were as tighly moulded as possible for a good mould to run the pieces in. |
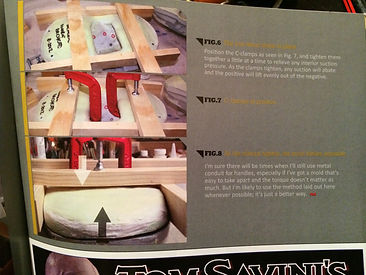
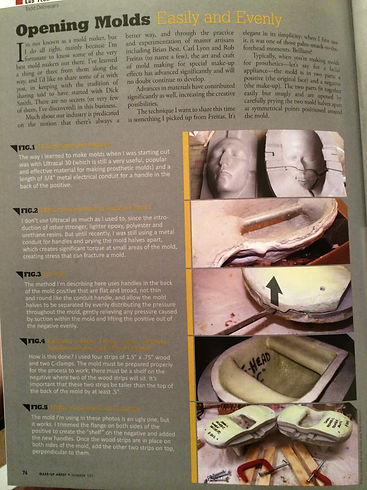
I found this article in makeup artist magazine which detailed a helpful process for opening moulds. Although it is concerning plaster moulds there are elements of the process which translate into any type of mould. It uses a variety of pressure points to release the plaster from the mould. By placing two wooden planks resting on the lower half and two across the upper half resting on the other planks when pressure is applied the two halves should separate much easier than without this process.
Opening Moulds issue 101 pg 76-77
This segment from Special Makeup Effects was particularly helpful for creating a clay wall when dividing the two halves of my cowl sculpt. I was originally unsure how to go about creating the wall, however this book has a detailed step-by-step process which was very informative for the process. There are many tips that it gives that I had not originally thought of for creating the wall. One such is to mark the sculpt with a marker pen to ensure that the wall is a straight divide minimising the risk of creating undercuts in the mould. When making the wall one should ensure that the clay is as neat as possible as this will translate onto the mould and if the mould fits together perfectly the results will be much more effective. The suggestion of blocks of clay to use as support on the back of the wall is particularly helpful as it prevents the issue of gravity causing effect on the wall. The point that a 'perfect wall will have no gaps where the water clay meets the oil clay' is an important one to consider. This will mean that the detail layer will not overlap the other side causing any undercuts or issues with the two part mould.
The book details a second way to create the divide between the two halves, by laying the scultpt down on its back resting it on clay in order that the back of the sculpt does not dent. The wooden wall is built around the head close to the height of the required wall. Once positioned the water clay is applied to the head along the premarked line. Once the wall has been built the mould can be created on a the sculpt while lying on a flat surface.
Debreceni.T. (2008) Special Makeup Effects for Stage and Screen; Making and Applying Prosthetics, Amsterdam: Focal Press pg 137-9
pg 140-142 debrecini
Shea.S (2013) Rob Freitas: Making a Lasting Impression, Makeup Aartist Magazine. Issue 103August/September, Pages 60-65
Fibreglass Moulds
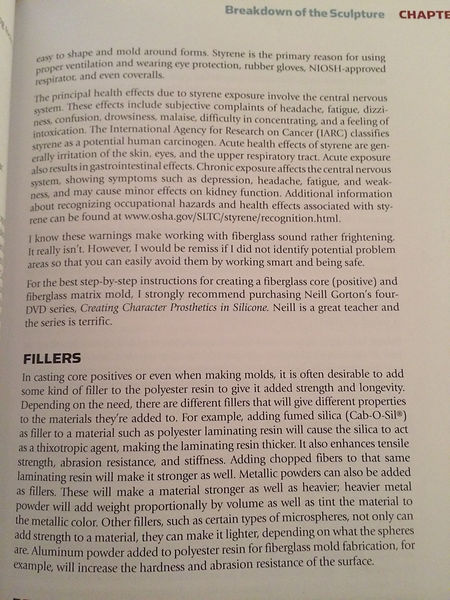
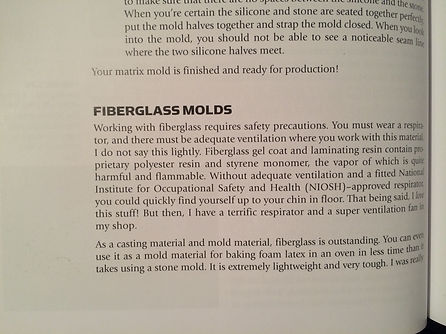
Todd Debreceni's book Special Makeup Effects has a large amount of detail on moulds, one section detailing information concerning fibreglass. As this is the primary material that we have available in the workshops I will focus my research around these materials. The book begins by detailing the importance of safety when working with fibreglass and resin as the materials have very harmful gases which if inhaled could cause seriosus harm to the individual. Debreceni also details the pros and cons of the material in comparison to plaster moulds and other materials. This provides me with the suitable knowledge to decide which material is best suited for each mould.
The following pages after the detailing of the benefits of fibreglass detail how to actually complete the mould using the material. There is a helpful list detailing all the necessary equipment and materials that will be needed to complete a two part fibreglass mould of a sculpt. A helpful pointer mentioned is the addition of cab-o-sil in the laminating resin to act as a thixotropic agent enhancing the strength, resistance and stiffness of the final result.
Debreceni.T. (2008) Special Makeup Effects for Stage and Screen; Making and Applying Prosthetics, Amsterdam: Focal Press pg 152-154
I found this article really interesting as it displays some incredible moulds, and touches on some concepts which are new to me and I would like to research further to get a better understanding. One such concept is the idea of puzzle moulds a mould that slots together in a certain way to create an advanced mould for prosthetics. The idea is that keys fit together to create the shell and the inner segments of the mould create pressure which hold the components together. It is only very briefly mentioned in the article however it has opened up a channel for me to explore further into the process of creating moulds. I would like to explore the creation of mutliple moulds for one prosthetic in a future project. The article mentions reading books on Madame Tussaud moulds and assemblence along with books on Formula 1 cars. I would never have considered these books for the mould-making process, however now that they have been pointed out it makes complete sense therefore I might research into these further when I try to create more advanced moulds in future projects. Overall this article is very helpful, it is formatted in an easy to read style with lots of conepts of varying complexity. Although a lot of the moulds mentioned are based around rubix cube-like moulds and are not relevant to this project it is a very interesting read to open many avenues of research.
Although it caused no problems in the mould I forgot to put prying points in the sculpt, therefore it was more likely that I damage the mould when trying to open it. This is something I must remember when making moulds in the future as it is an essential detail.